Ideogram4.5
CreatePromptsPricing

IDEOGRAM 4.5 PROMPTS

Ideogram 4.5 Prompt Library

Ready-to-use prompts for the edits Ideogram 4.5 does best. Pick a use case, open a prompt in the studio, then change the details to fit your image.

  1. 01

    Pick a use case

    Each group starts with a prompt you can generate without uploading anything.

  2. 02

    Open it in the studio

    Edit prompts need a starting image. Upload your own, or generate the starter and choose “Edit this image”.

  3. 03

    Make it yours

    Swap colors, objects and quoted words. Change one thing per edit and keep the “keep everything else” line.

Color and lightingText modificationProduct photographyInterior designArchitectureRestore old photosSketch to image
01

Color and lighting

Recolor one object or change the time of day while the scene stays put.

Start hereGenerate · 16:9
Sunlit reading corner

Sunlit reading corner

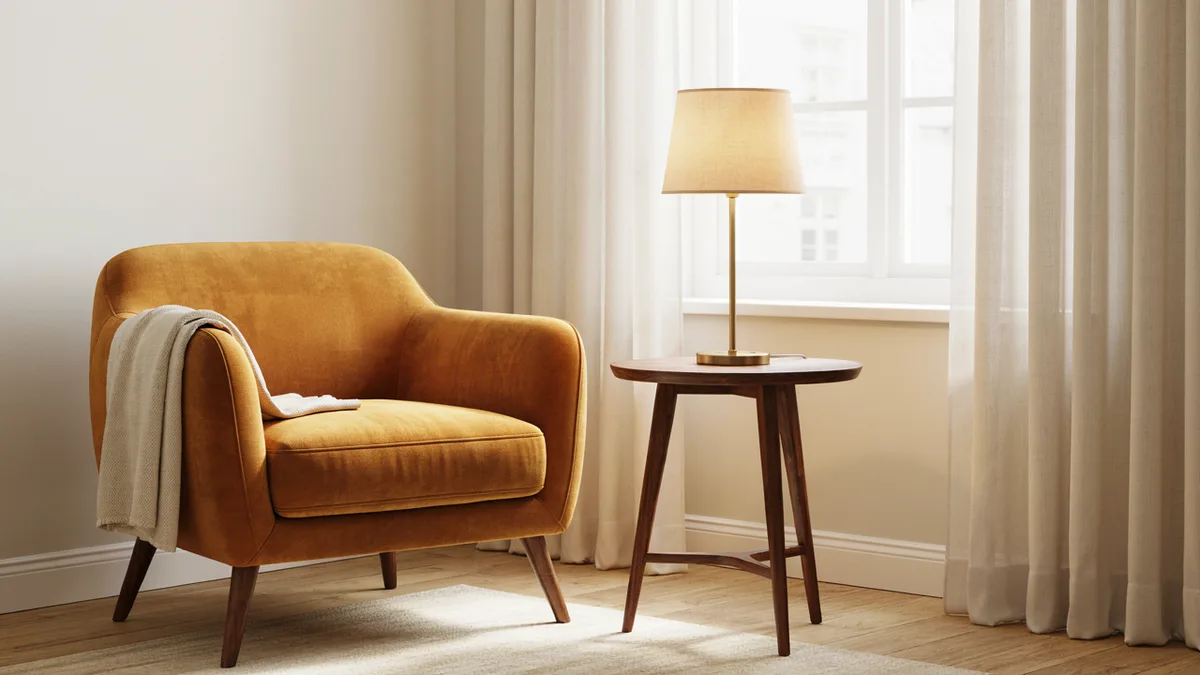
Interior photograph of a sunlit reading corner: a mustard velvet armchair, a walnut side table with a brass lamp, a tall window with sheer curtains and light oak floorboards. Eye-level camera, natural daylight, true-to-life materials, no people, no text.

Generate this first, then choose “Edit this image” to try the edits below.

Use in studio
Edit · Needs a starting image
Recolor one object: After
Recolor one object: Before
BeforeAfter

Recolor one object

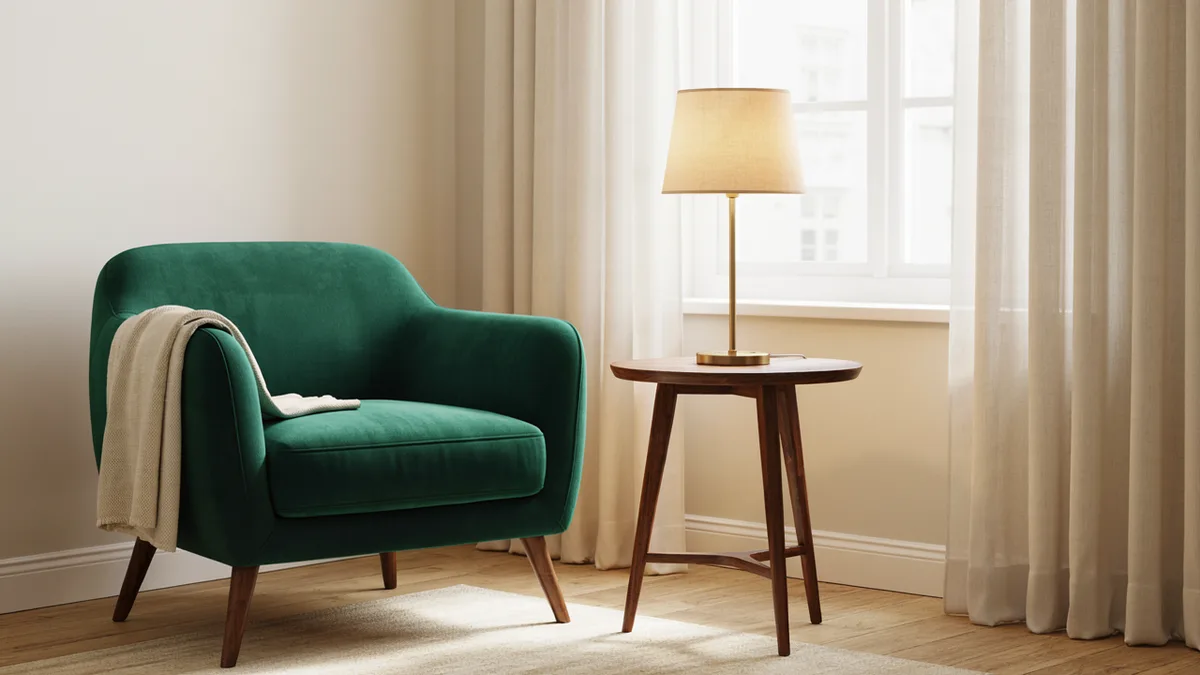
Change only the armchair upholstery to deep forest-green velvet. Keep its shape, stitching, cushions and position, the lighting, the camera angle and everything else in the image exactly as it is.

Name one object and one finish. Mark the object first when nearby items share its color.

Use in studio
Edit · Needs a starting image
Golden-hour light: After
Golden-hour light: Before
BeforeAfter

Golden-hour light

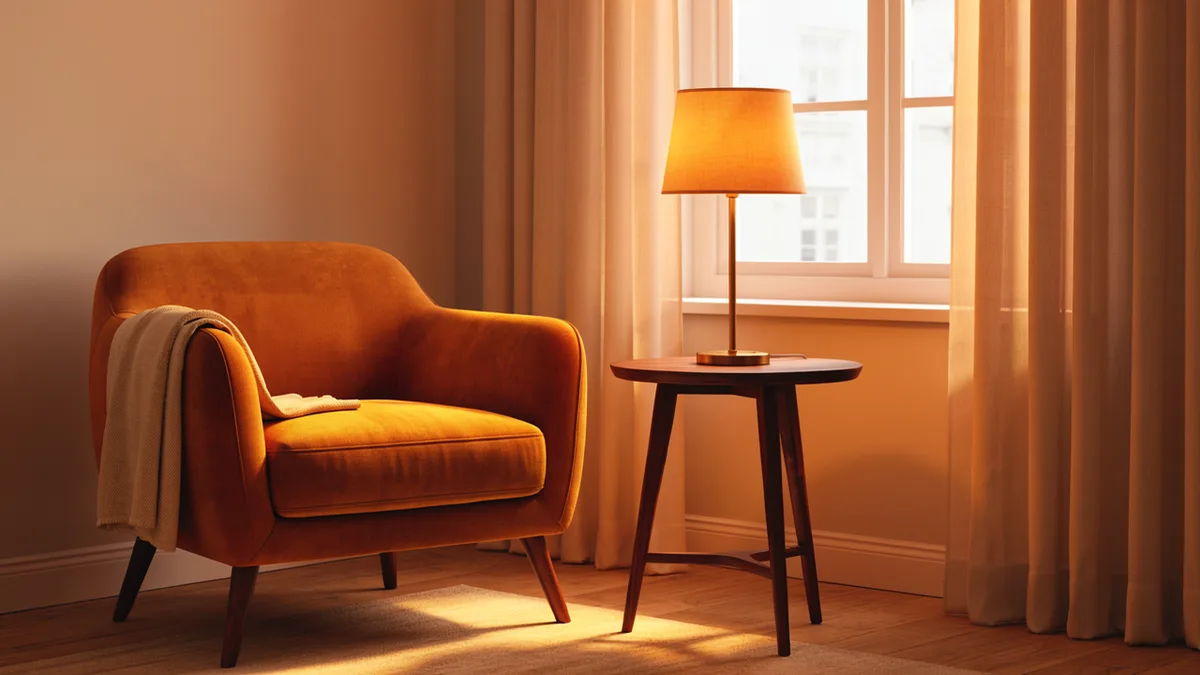
Turn the scene into warm golden hour: strong low orange sunlight streams in through the window, casting long diagonal shadows of the window frame across the floor and over the armchair, with a warm amber glow on the walls. The armchair, the table, the lamp, the curtains, the camera and the composition stay exactly as they are.

Describe the light itself: its direction, color and the shadows it casts.

Use in studio
Edit · Needs a starting image
Evening lamplight: After
Evening lamplight: Before
BeforeAfter

Evening lamplight

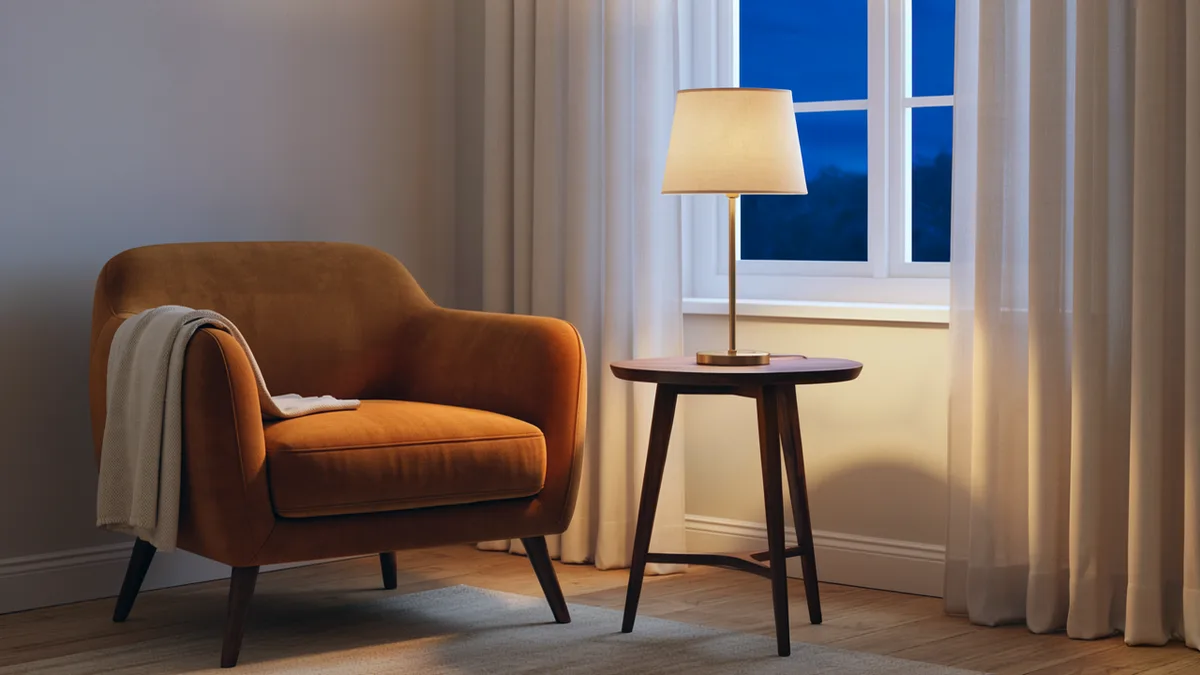
Make it evening: the window shows a deep blue dusk sky, and the lamp casts a warm pool of light over the armchair and side table. Every object keeps its shape and position, and the camera stays exactly the same.

Describe where the new light comes from and what it falls on.

Use in studio
02

Text modification

Rewrite, update or translate the words in a sign, menu or design.

Start hereGenerate · 3:4
Café menu card

Café menu card

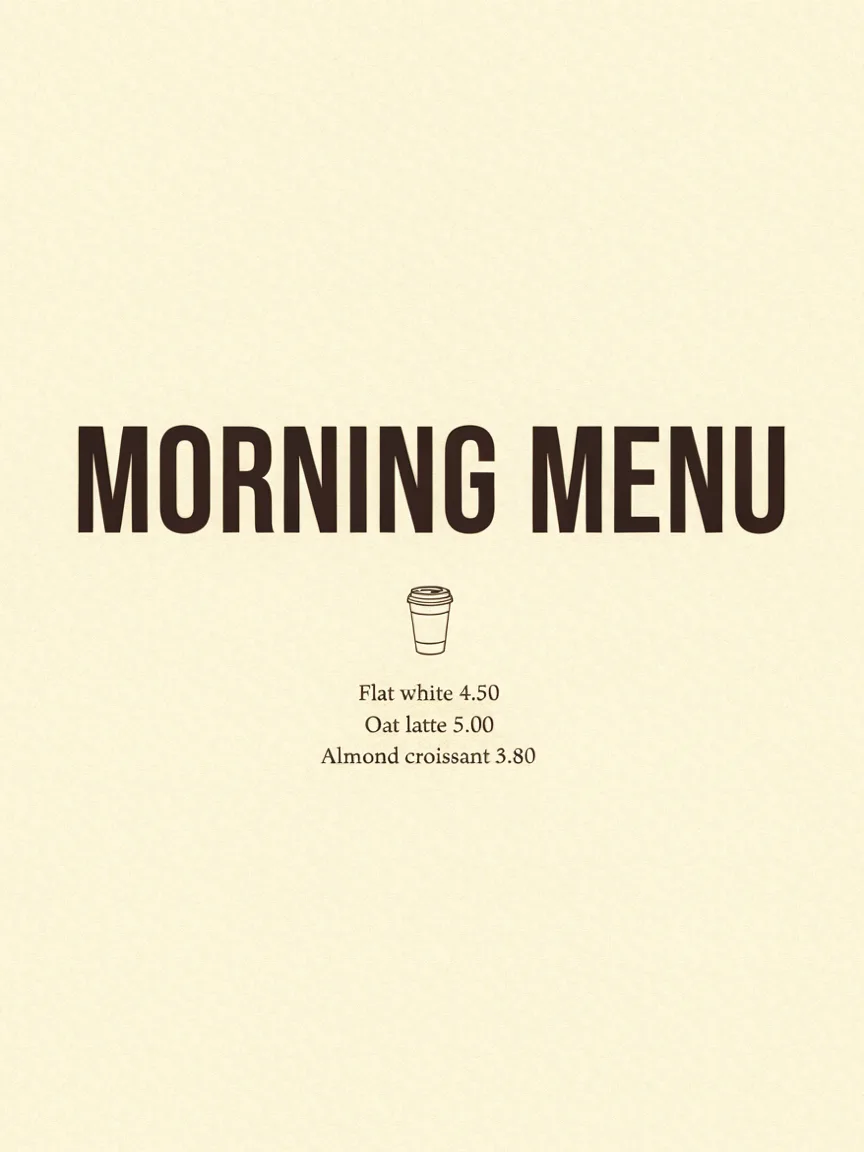
A minimalist café menu printed on cream card. Headline "MORNING MENU" in bold condensed capitals. Below it, three lines in small type: "Flat white 4.50", "Oat latte 5.00", "Almond croissant 3.80". A small line illustration of a coffee cup, generous margins, warm paper texture, no other words.

Put every word you want in the image in quotation marks.

Use in studio
Edit · Needs a starting image
Replace a headline: After
Replace a headline: Before
BeforeAfter

Replace a headline

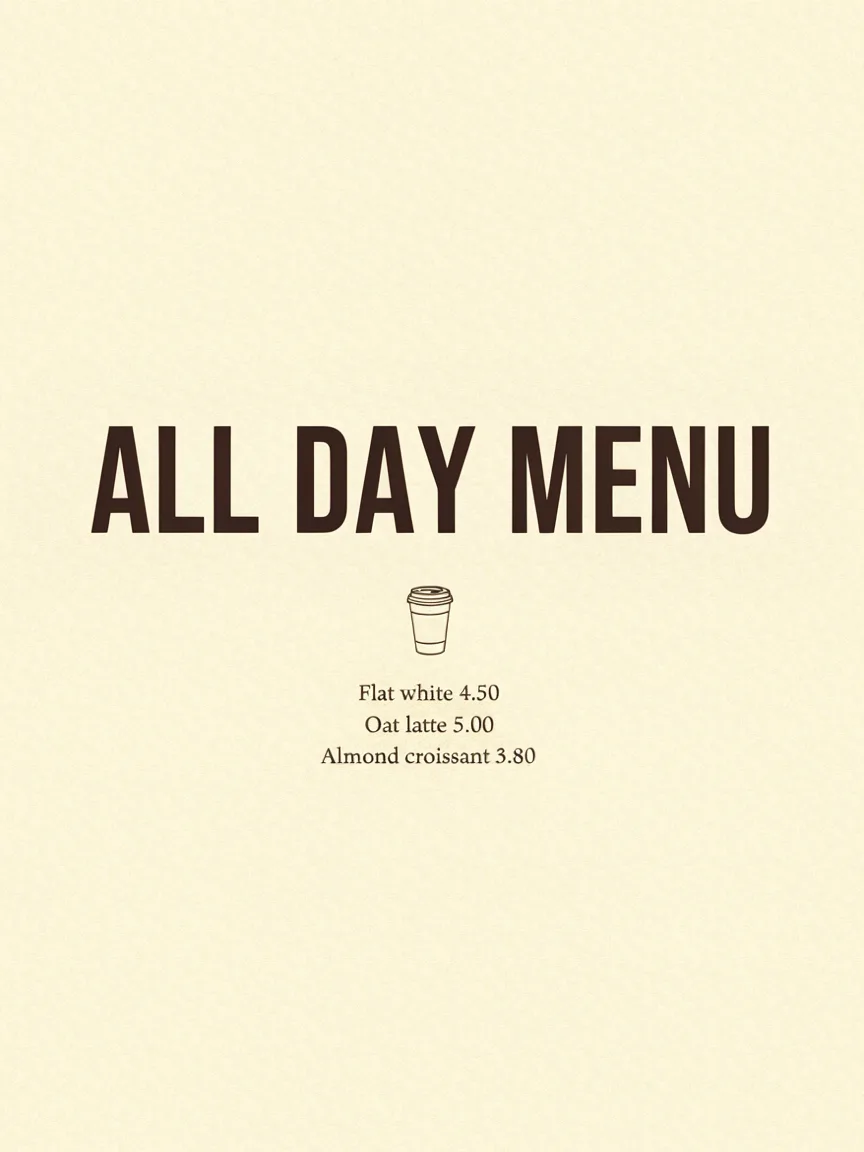
Replace "MORNING MENU" with exactly "ALL DAY MENU". Keep the same letterforms, weight, size, color, alignment and position. Every other line, the illustration and the paper stay exactly as they are.

Quote both the old and the new text, then check the result letter by letter.

Use in studio
Edit · Needs a starting image
Update a price: After
Update a price: Before
BeforeAfter

Update a price

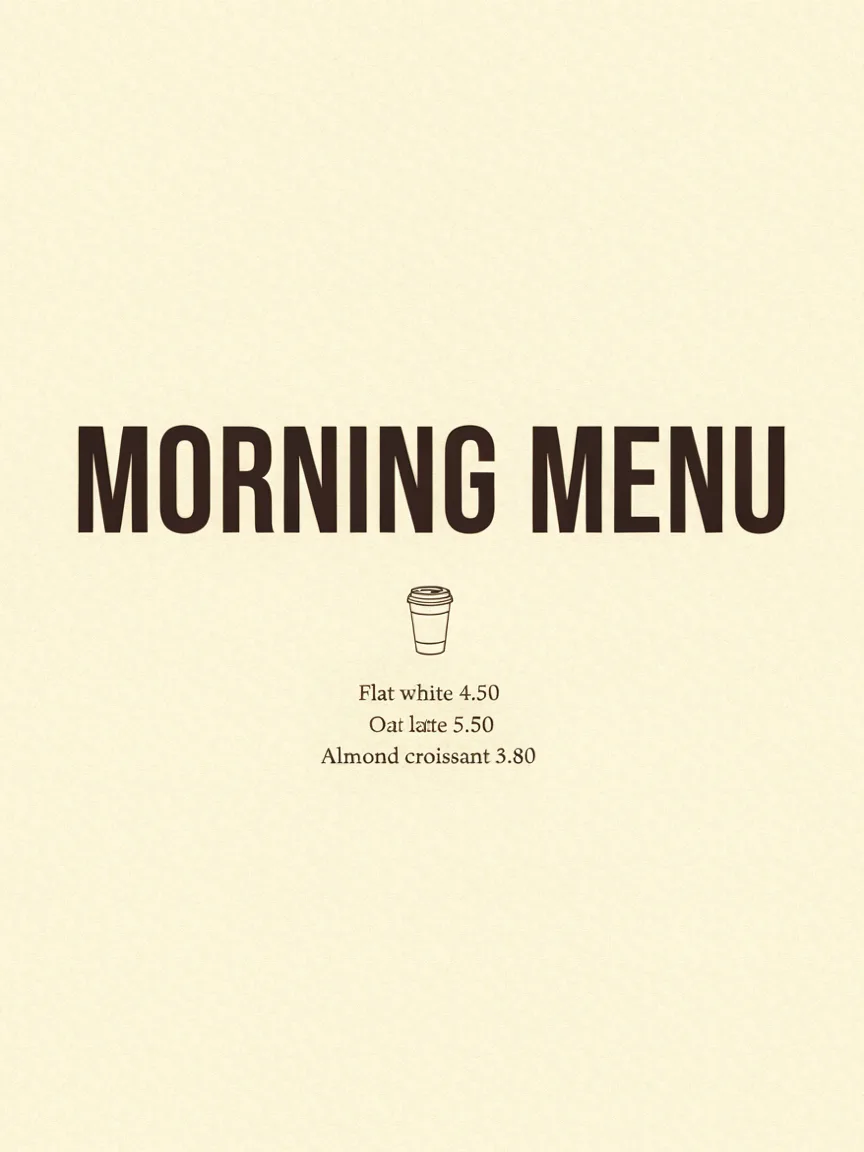
Change "Oat latte 5.00" to "Oat latte 5.50". Keep the same typeface, size, color and line position; nothing else in the image changes.

Change one line per edit. Mark the line when similar text sits nearby.

Use in studio
Edit · Needs a starting image
Translate all text: After
Translate all text: Before
BeforeAfter

Translate all text

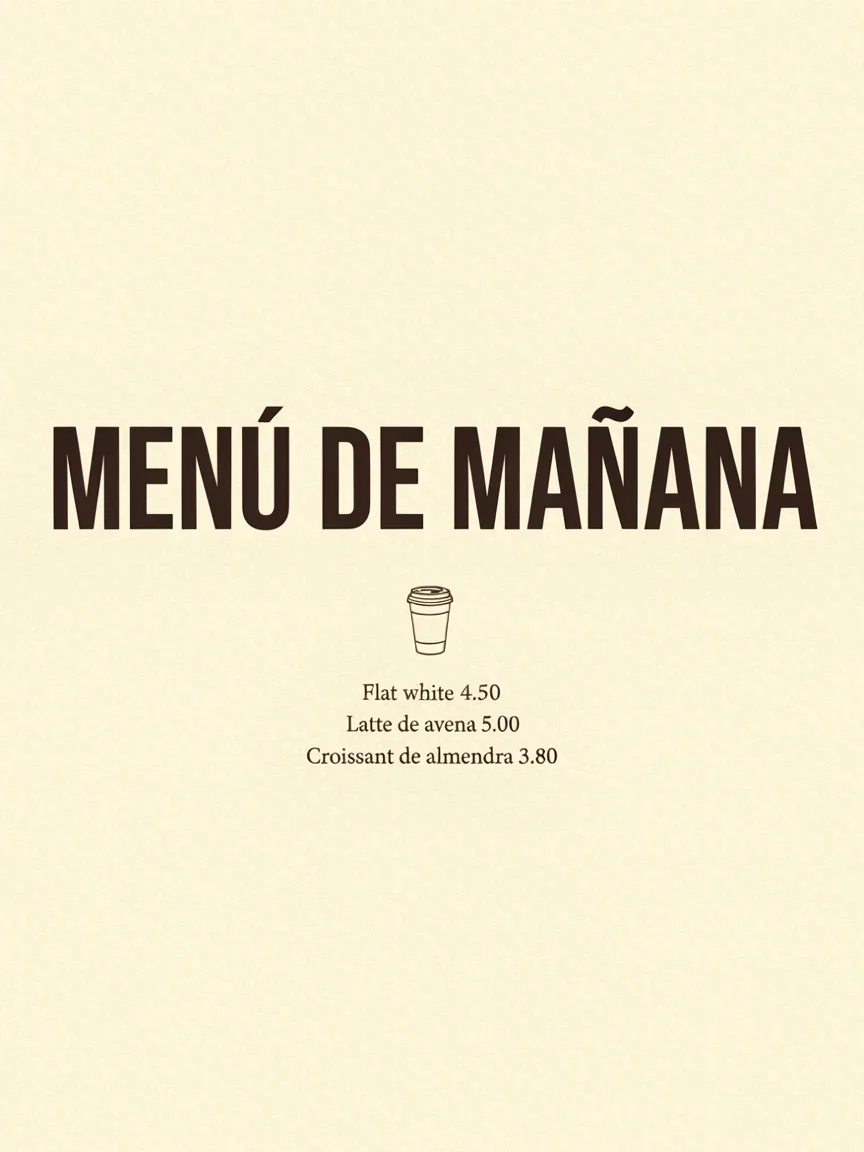
Translate all the text into Spanish, keeping the same typography, hierarchy, sizes and positions. The illustration, the colors and the paper stay exactly as they are.

Name the language. For full control, give each translated line in quotes.

Use in studio
03

Product photography

Change the backdrop, add props or place the same product in a new scene.

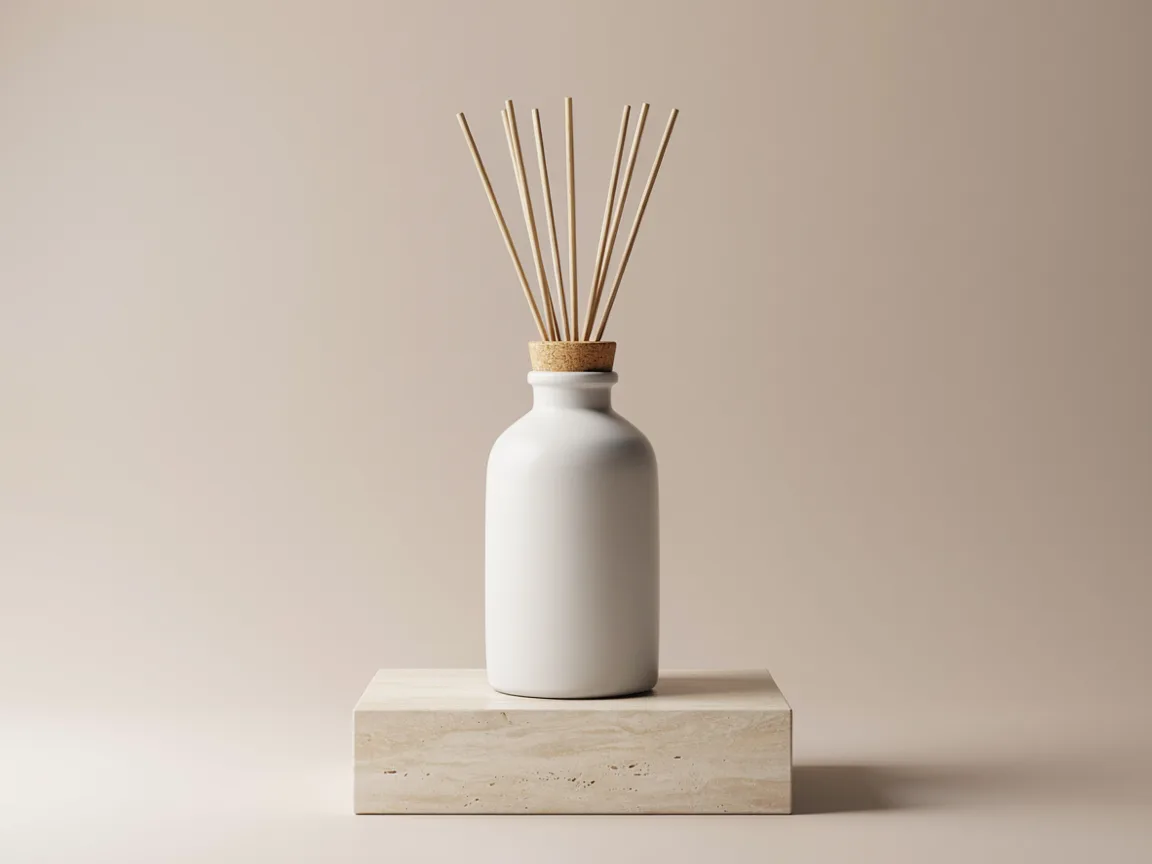
Start hereGenerate · 4:3
Studio product shot

Studio product shot

Commercial product photograph of a matte white ceramic diffuser bottle with a cork stopper and reed sticks, standing on a pale travertine block. Seamless warm-grey backdrop, soft light from the left, realistic contact shadow, crisp focus, no text, no logos.

Define subject, surface, backdrop and light before adding style.

Use in studio
Edit · Needs a starting image
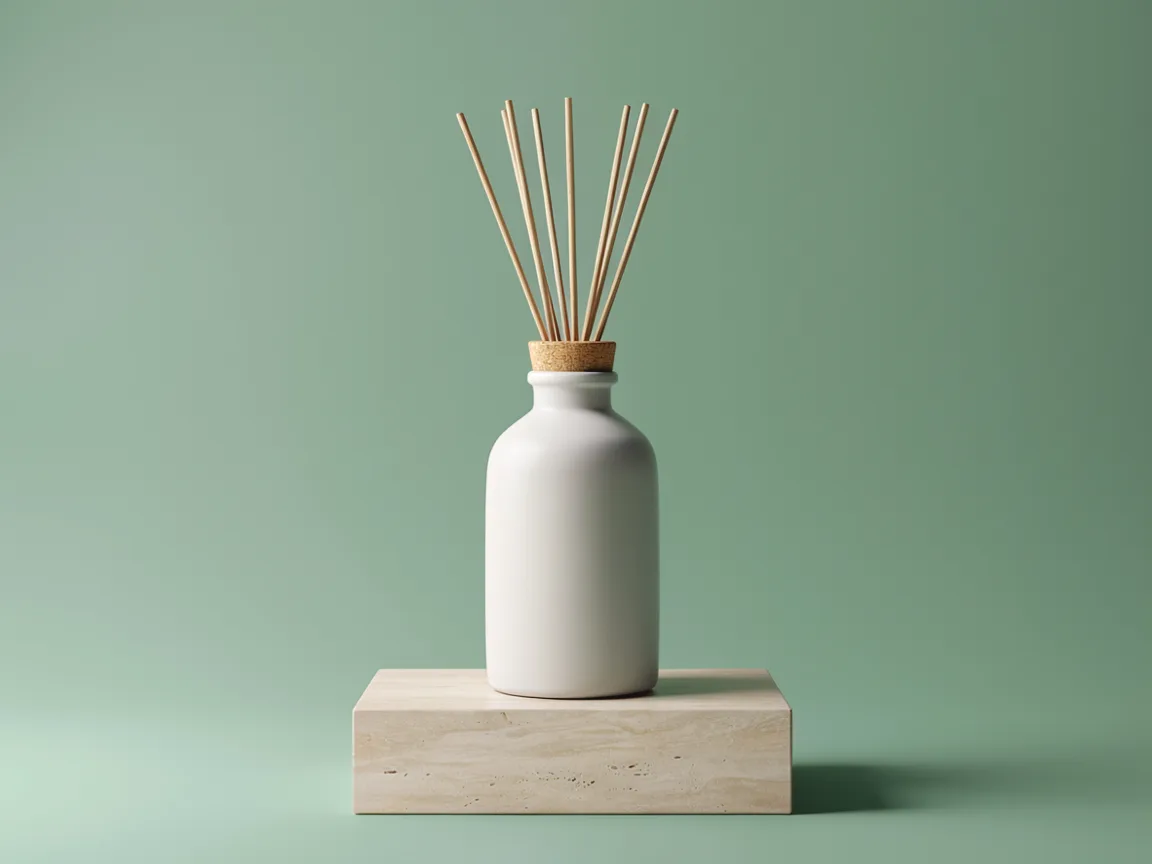
Change the backdrop: After
Change the backdrop: Before
BeforeAfter

Change the backdrop

Replace only the backdrop with a sage-green seamless sweep. Keep the product's exact shape, size, position, material and stopper, the stone block, the direction of the light and the camera.

Check edges around thin or transparent parts before the next edit.

Use in studio
Edit · Needs a starting image
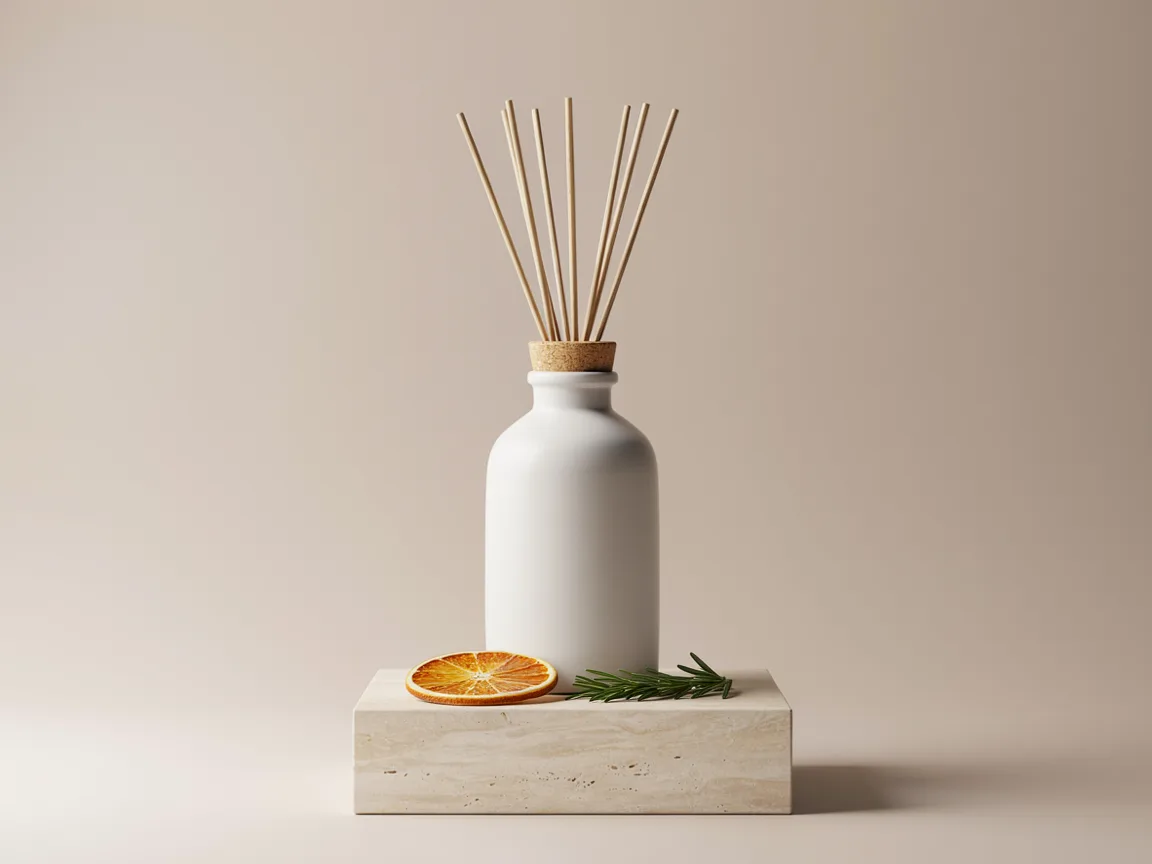
Add styling props: After
Add styling props: Before
BeforeAfter

Add styling props

Add a dried orange slice and a sprig of rosemary on the stone block in front of the bottle, with natural shadows. Keep the bottle, the block, the backdrop, the light and the framing exactly as they are.

Say where each prop goes and ask for natural shadows.

Use in studio
Edit · Needs a starting image
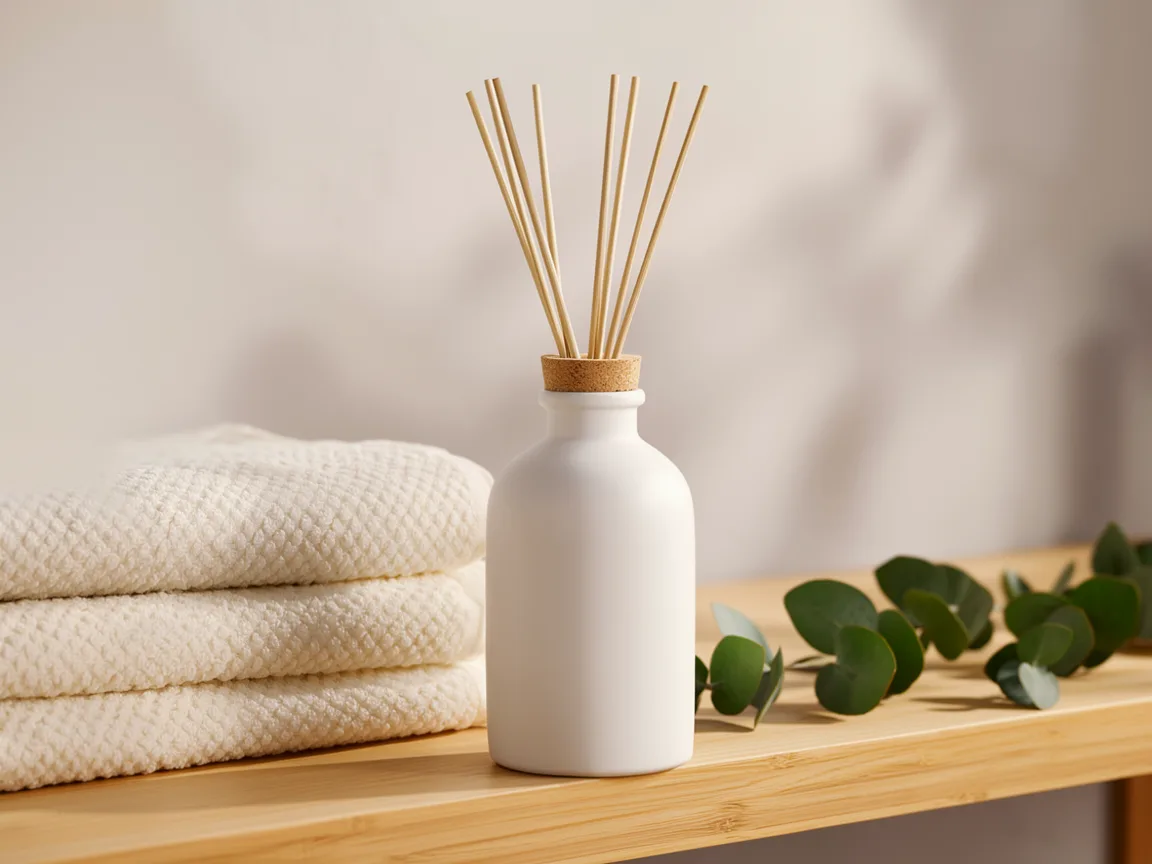
New lifestyle scene: After
New lifestyle scene: Before
BeforeAfter

New lifestyle scene

Place the same diffuser on a bathroom shelf beside folded linen towels and a eucalyptus sprig, in soft morning window light. It stays exactly the same product: identical shape, proportions, materials, color and details, with a realistic contact shadow. No text or logos added.

Repeat that it is exactly the same product so shape and details hold.

Use in studio
04

Interior design

Try new wall finishes, furniture and styling in the same room.

Start hereGenerate · 16:9
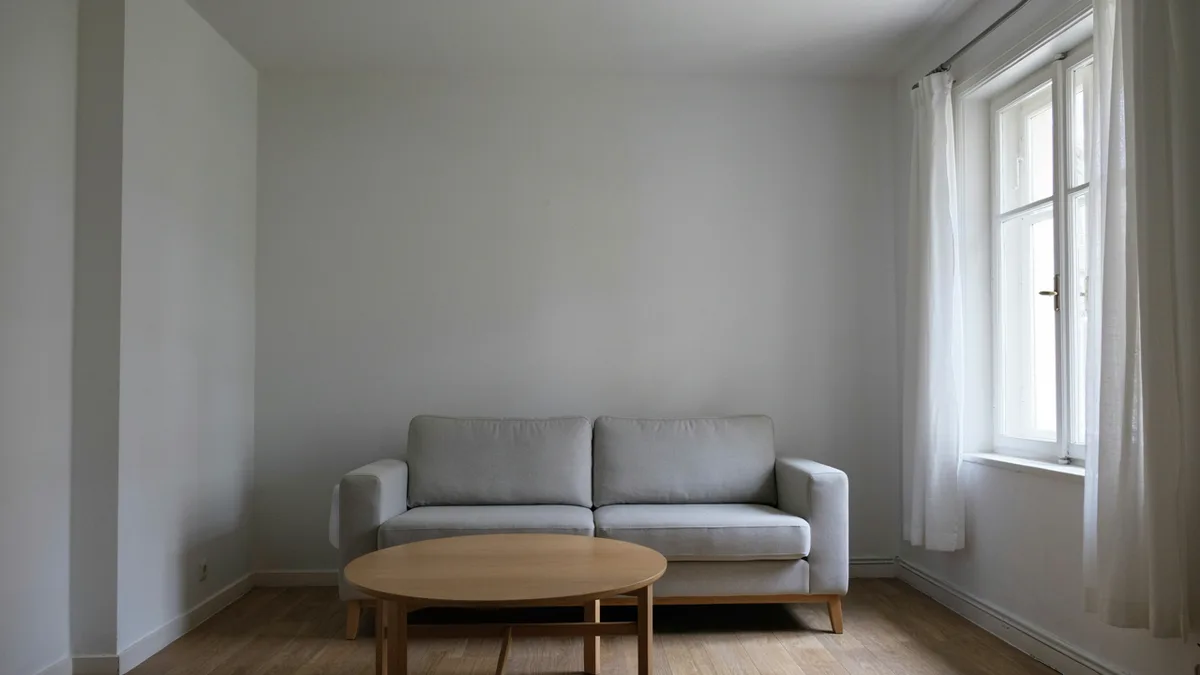
Plain living room

Plain living room

Interior photograph, wide angle at eye level with straight verticals: a plain living room with a light grey sofa, a round coffee table, a large window and bare white walls. Natural daylight, true-to-life materials, no people, no text.

A plain room is the easiest starting point for a series of design edits.

Use in studio
Edit · Needs a starting image
New wall finish: After
New wall finish: Before
BeforeAfter

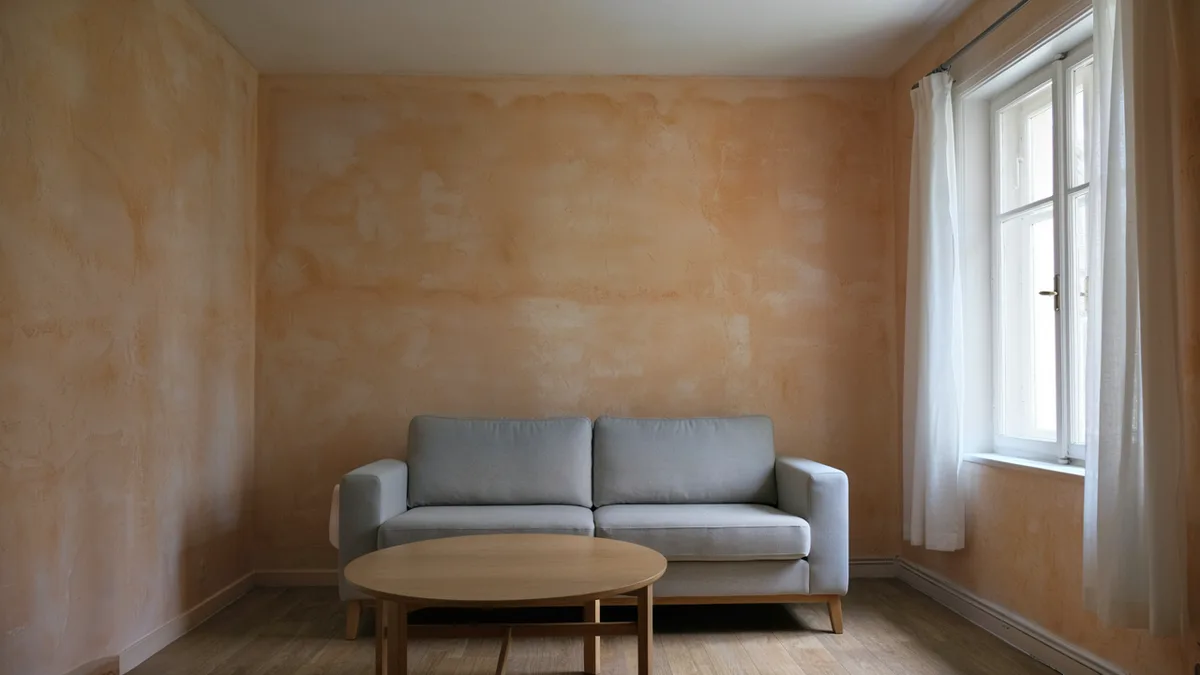
New wall finish

Finish the walls in a warm clay limewash with a soft hand-troweled texture. Keep the camera, the room geometry, the window, the floor and every piece of furniture exactly as they are.

Describe both color and texture of the finish.

Use in studio
Edit · Needs a starting image
Swap the sofa: After
Swap the sofa: Before
BeforeAfter

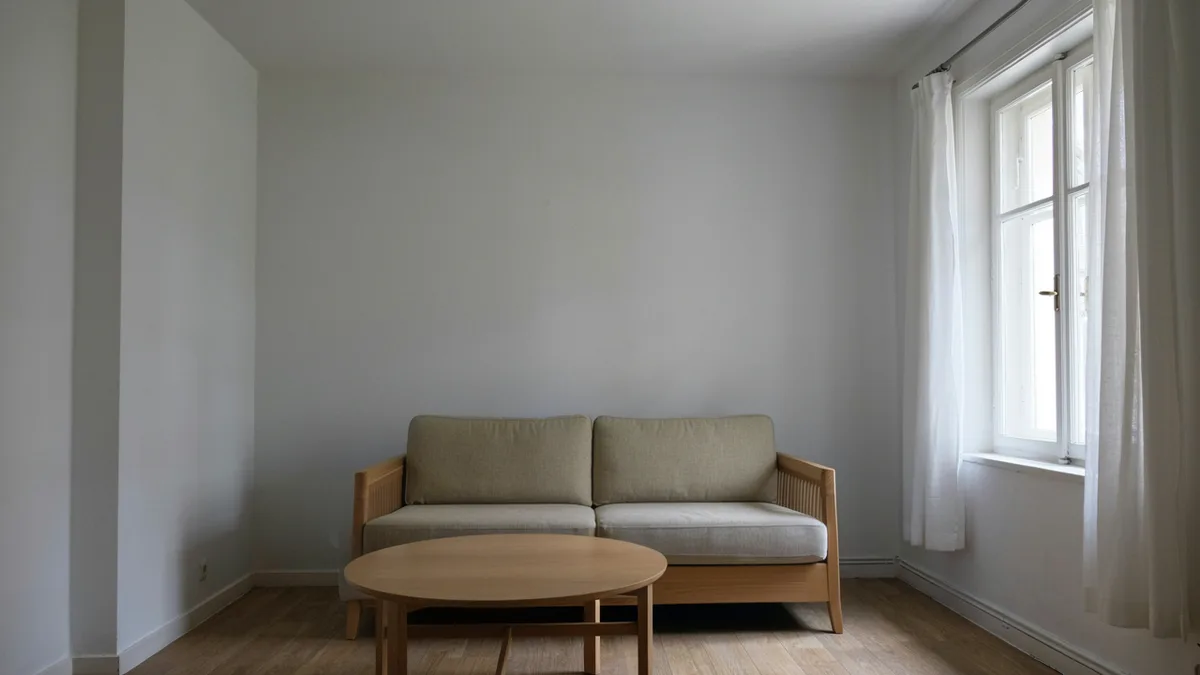
Swap the sofa

Replace the grey sofa with a low oak-framed sofa with oatmeal linen cushions, in the same place and at the same scale. Keep the camera, the walls, the window, the floor and everything not mentioned exactly as they are.

Ask for the same place and scale so the room layout holds.

Use in studio
Edit · Needs a starting image
Add soft furnishings: After
Add soft furnishings: Before
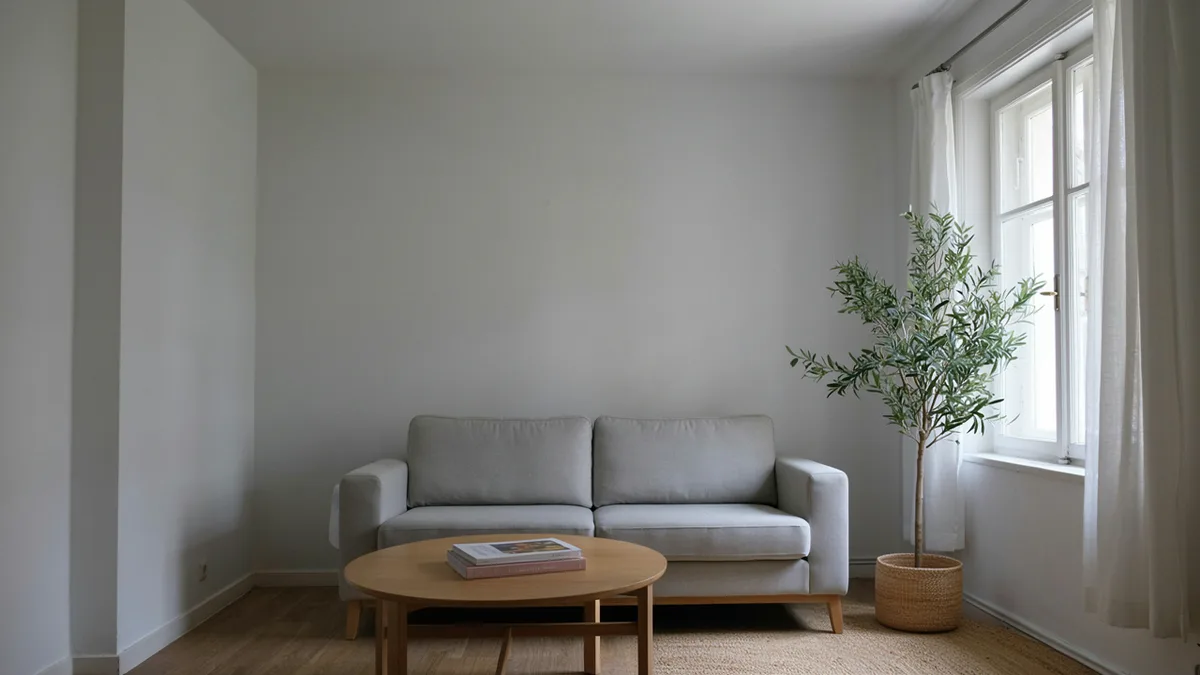
BeforeAfter

Add soft furnishings

Add a large round jute rug under the coffee table, a tall olive tree in a woven basket beside the window and a stack of art books on the table. Keep the camera, the room and every existing piece of furniture exactly as they are.

List each new item with its position in the room.

Use in studio
05

Architecture

Repaint a façade, add landscaping or clear a street photo.

Start hereGenerate · 16:9
Brick house exterior

Brick house exterior

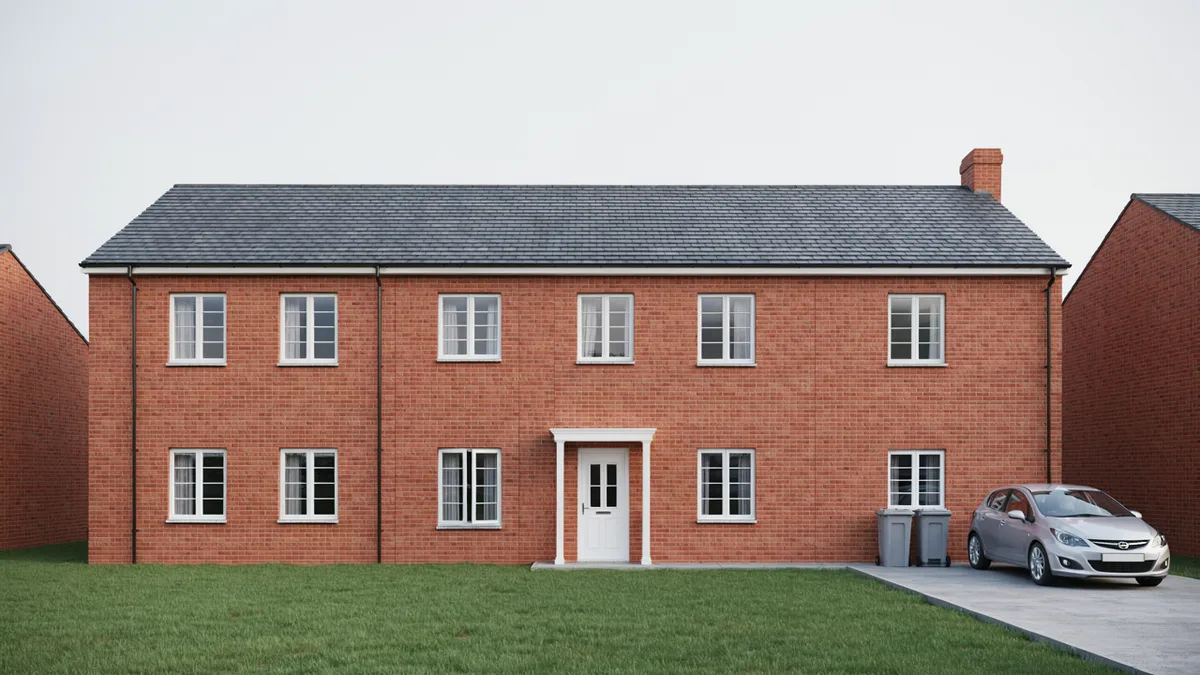
Architectural photograph of a simple two-storey red-brick house with a pitched slate roof, white window frames and a plain front lawn, with a parked silver hatchback and two grey wheelie bins on the driveway. Overcast daylight, straight verticals, eye-level camera, no people, no text.

Straight verticals and an eye-level camera make later edits cleaner.

Use in studio
Edit · Needs a starting image
Repaint the façade: After
Repaint the façade: Before
BeforeAfter

Repaint the façade

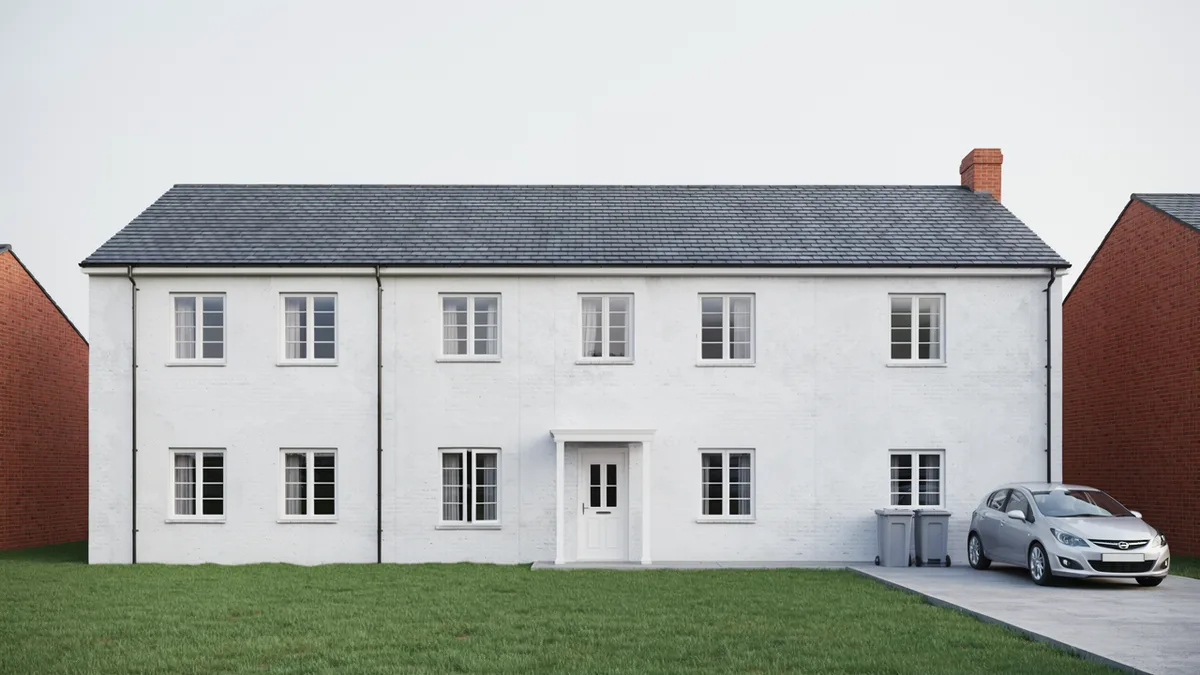
Paint the brick façade a soft limewashed white, keeping the window frames, the roof and the door unchanged. Keep the building's shape, proportions and roofline, the camera, the sky and everything not mentioned exactly as they are.

Name what keeps its color, such as trim, roof or door.

Use in studio
Edit · Needs a starting image
Add landscaping: After
Add landscaping: Before
BeforeAfter

Add landscaping

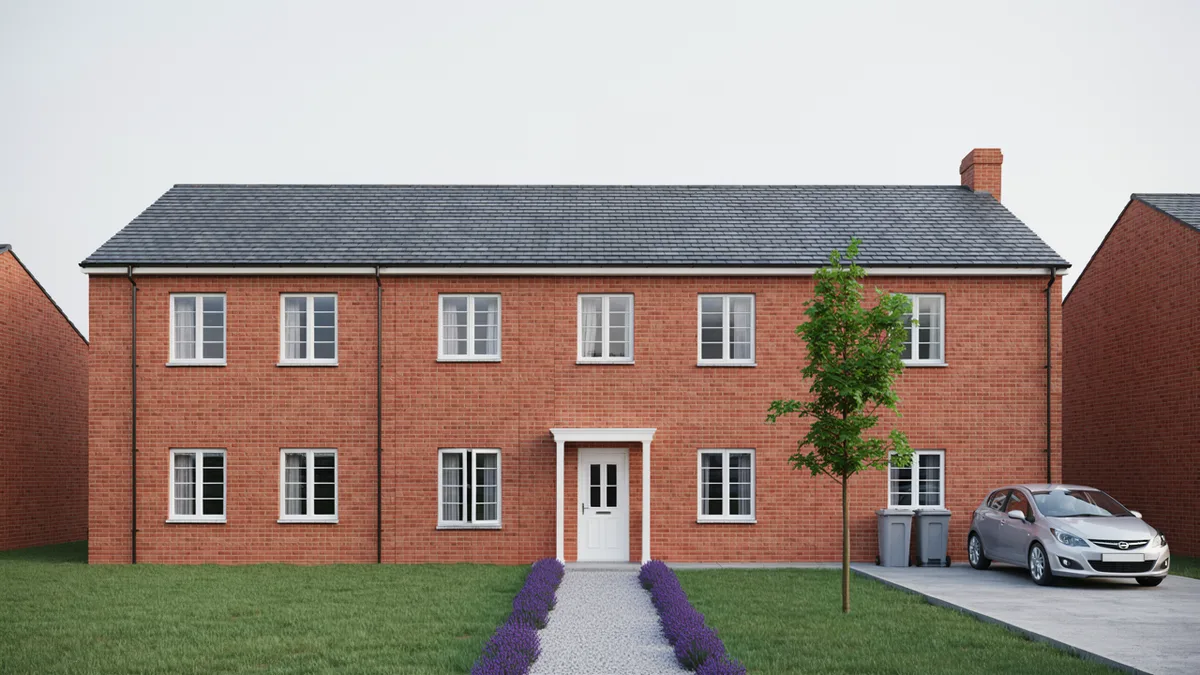
Add a gravel path to the front door, low lavender borders along the path and a young maple tree on the right side of the lawn. Keep the building, the camera, the framing and the sky exactly as they are.

Place each addition relative to the building.

Use in studio
Edit · Needs a starting image
Clear the street: After
Clear the street: Before
BeforeAfter

Clear the street

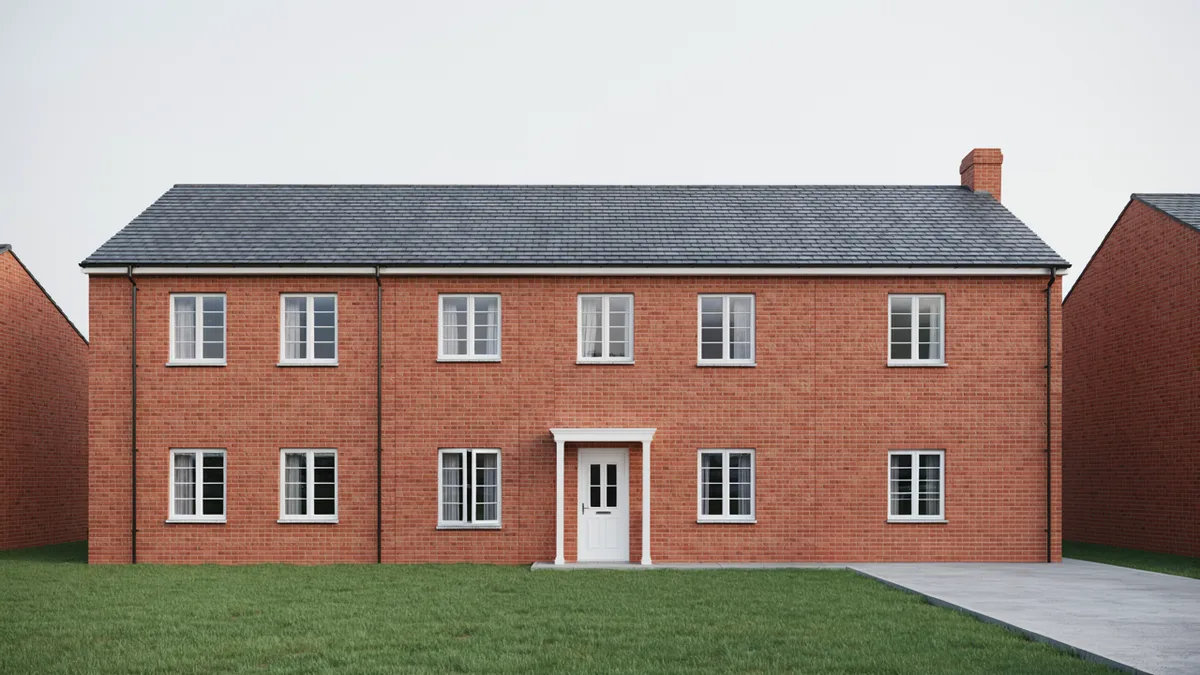
Remove the parked car and the wheelie bins from the driveway, filling in the driveway and the lawn naturally. Keep the building and everything else exactly as it is.

Mark the objects to remove, then describe how the space should be filled.

Use in studio
06

Restore old photos

Remove damage first, then add natural color, without changing faces.

Start hereGenerate · 4:3
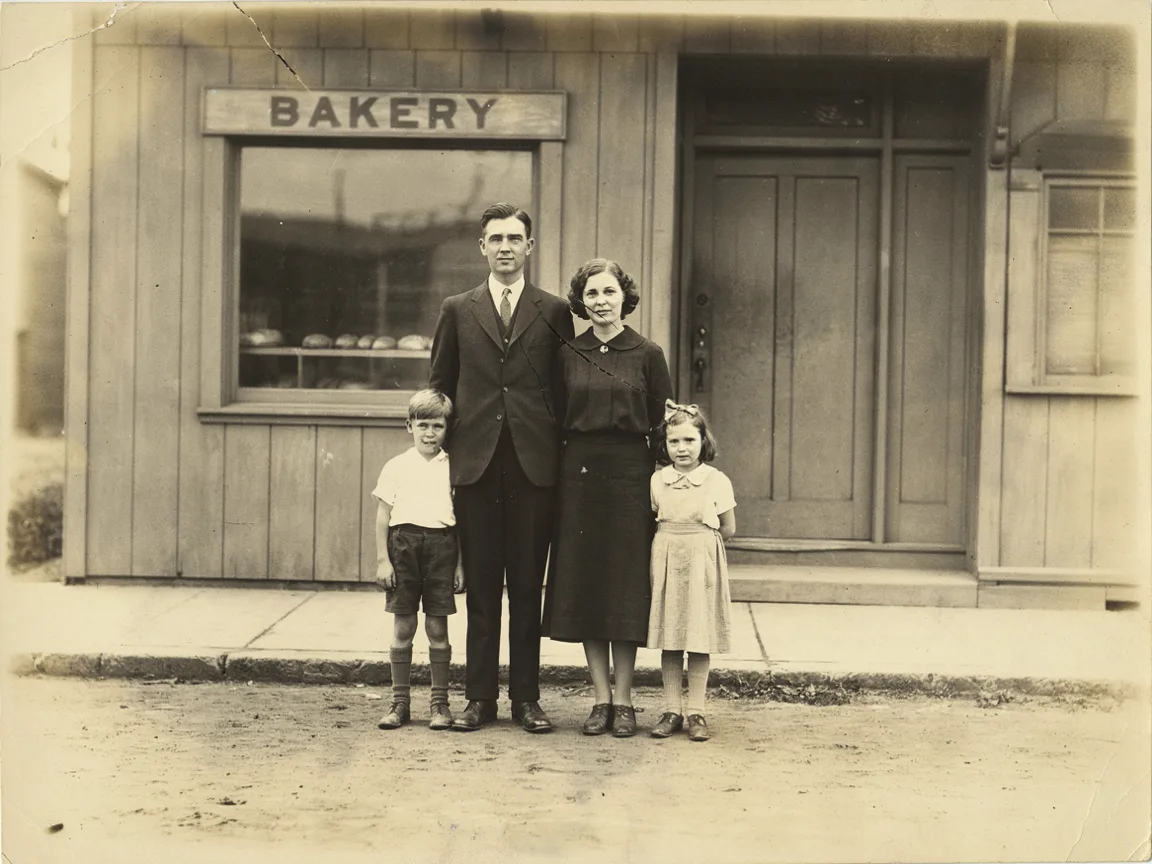
A damaged practice photo

A damaged practice photo

A faded black-and-white photograph from the 1920s of a family of four standing in front of a small bakery with a painted sign reading "BAKERY". The print is badly damaged: a dark crack runs diagonally across the parents' faces, white scratches and patches of lost emulsion cover the children's faces, with dust specks, a crease across one corner and yellowed, uneven tones.

No old photo at hand? Generate one to practice the restoration steps.

Use in studio
Edit · Needs a starting image
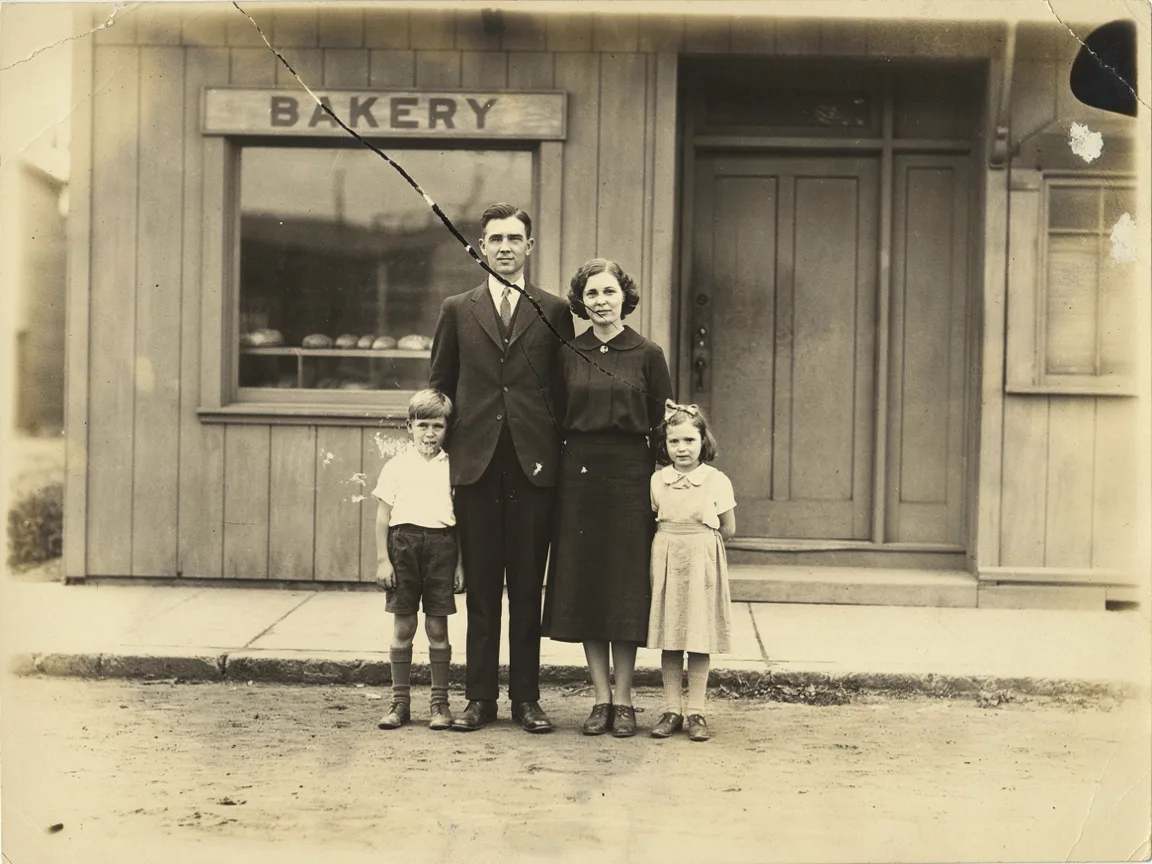
Repair the damage: After
Repair the damage: Before
BeforeAfter

Repair the damage

Restore this old photograph: remove scratches, dust, stains, creases and tears, even out the faded tones and recover lost detail. Keep it black and white, and keep every face, figure, building and letter exactly as it is.

Restore first and keep it black and white; color comes in a separate edit.

Use in studio
Edit · Needs a starting image
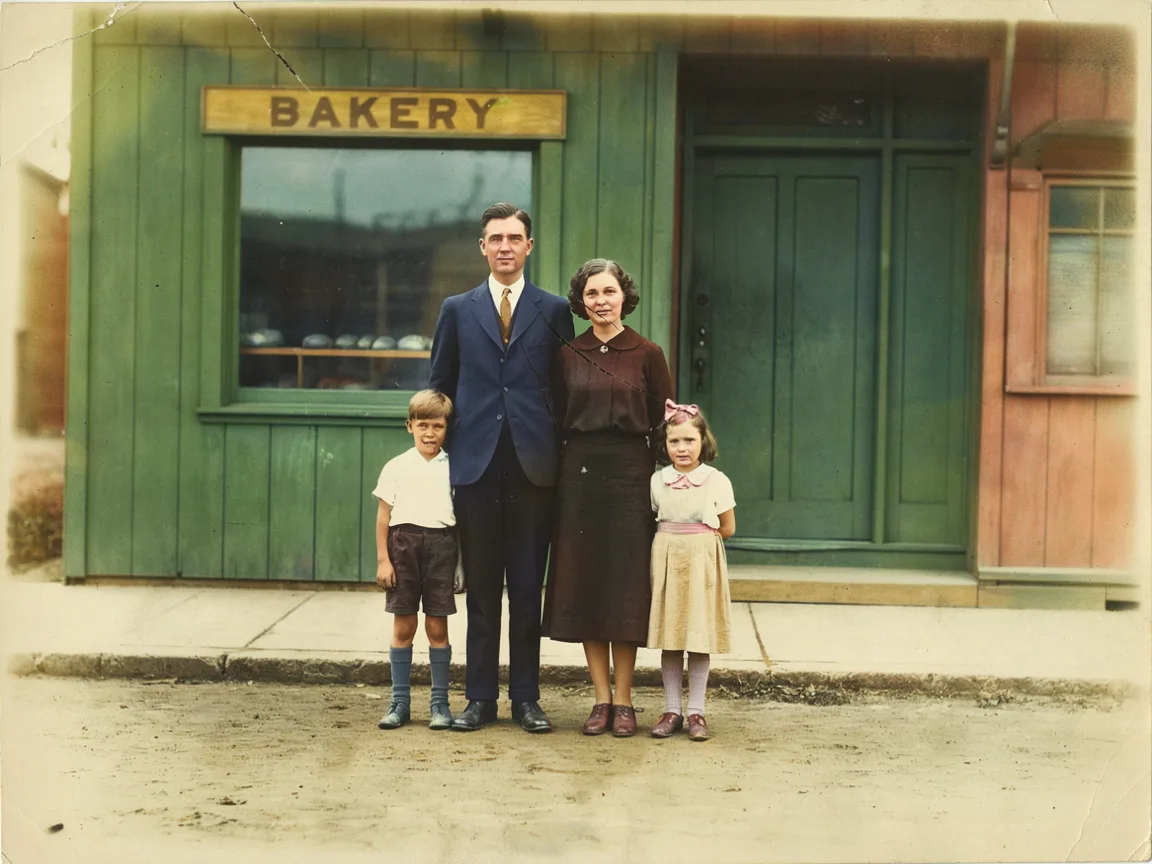
Colorize naturally: After
Colorize naturally: Before
BeforeAfter

Colorize naturally

Colorize this restored photograph naturally with period-appropriate colors: a dark green shopfront with gold lettering, navy and brown wool clothing, warm red brick and a pale grey sky. Natural skin tones. Keep every face, shape and letter exactly as it is.

Replace the listed colors with what you know about the scene.

Use in studio
Edit · Needs a starting image
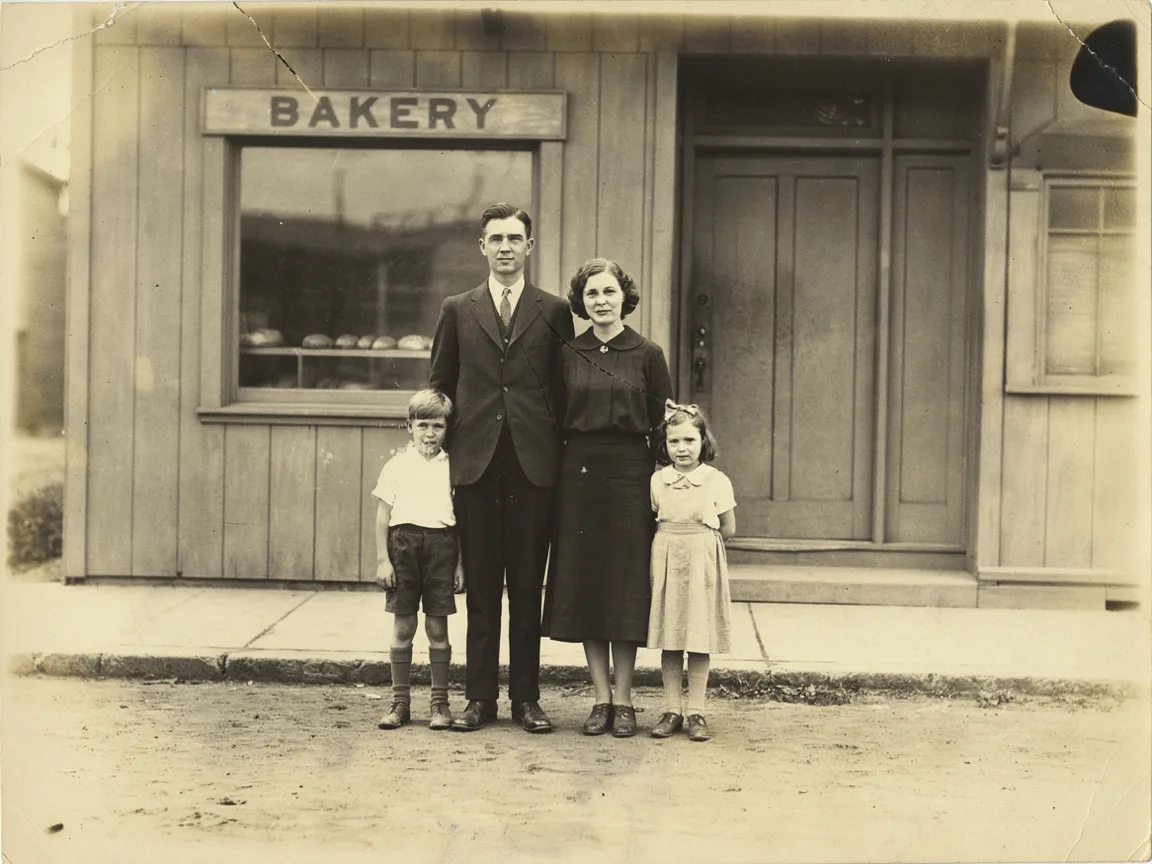
Repair faces carefully: After
Repair faces carefully: Before
BeforeAfter

Repair faces carefully

Repair the damage across the faces only: fill the cracks and lost emulsion and recover soft natural detail. Each person keeps exactly the same features, expression, age and pose; do not smooth or beautify. Everything else stays exactly as it is.

Mark only the damaged area and ask for no smoothing.

Use in studio
07

Sketch to image

Turn a drawing into a photograph that keeps its lines and proportions.

Start hereGenerate · 4:3
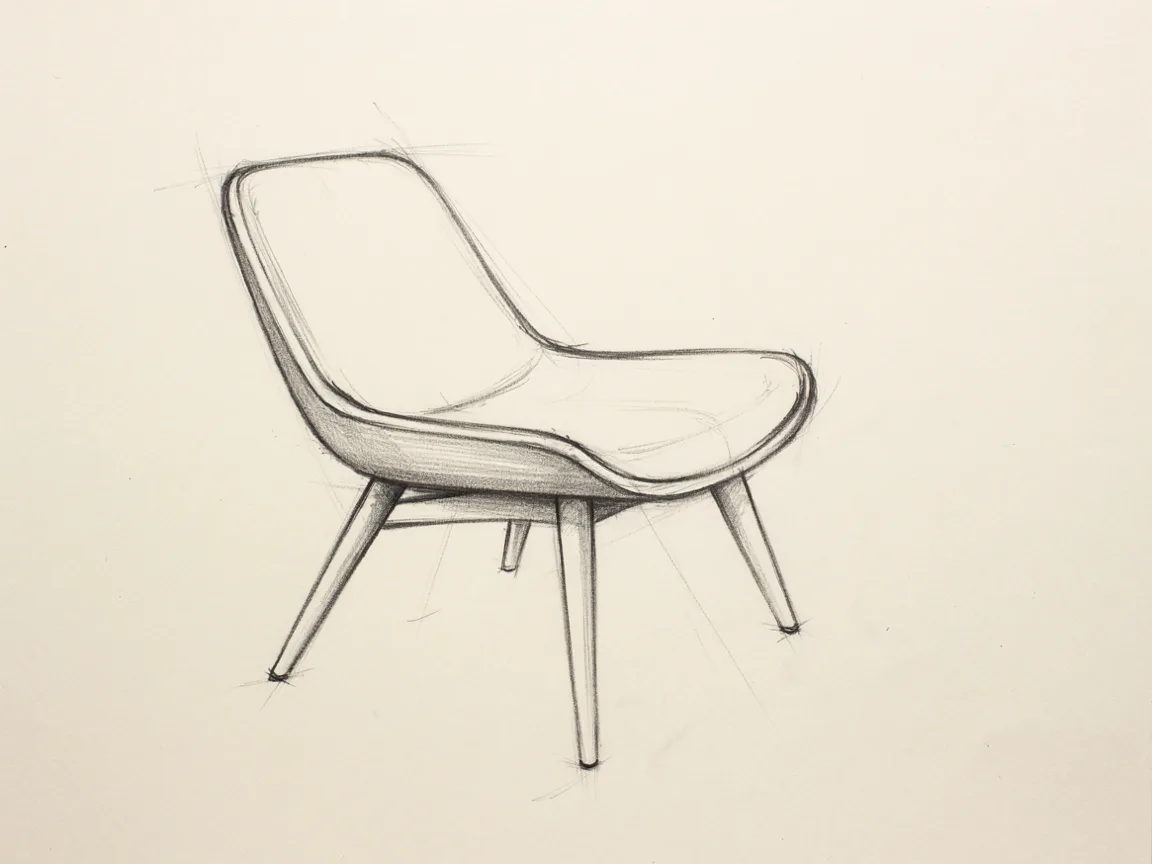
Pencil chair sketch

Pencil chair sketch

A loose graphite pencil sketch of a mid-century lounge chair with a curved plywood shell and tapered legs, three-quarter view, on plain off-white paper, light construction lines, no background, no text.

Generate a sketch to try the flow, or upload a photo of your own drawing.

Use in studio
Edit · Needs a starting image
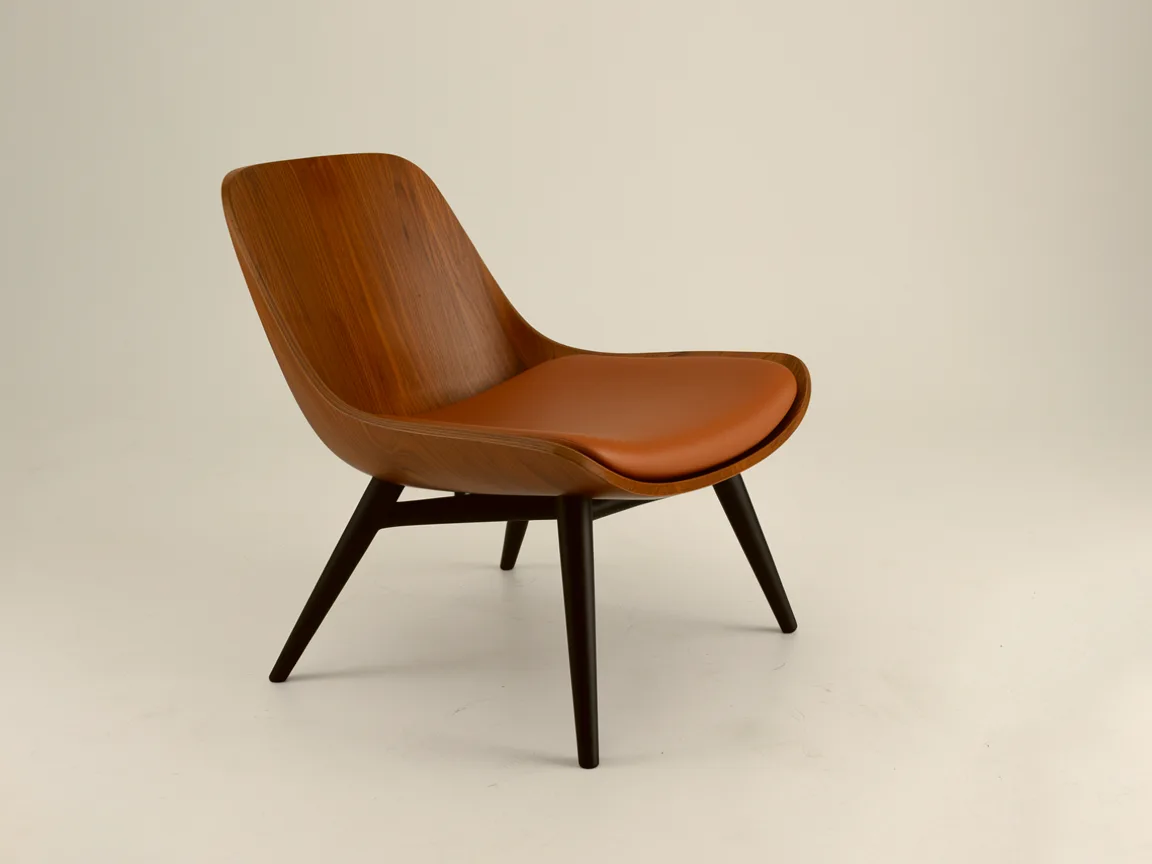
Sketch to product photo: After
Sketch to product photo: Before
BeforeAfter

Sketch to product photo

Render this sketch as a photorealistic product photograph of the same chair: a walnut plywood shell, a cognac leather cushion and black steel legs, on a light grey studio floor in soft daylight from the same angle. Same outline, proportions and viewpoint; turn the paper into the studio scene. No text.

The drawing sets the geometry; your words set materials and light.

Use in studio
Edit · Needs a starting image
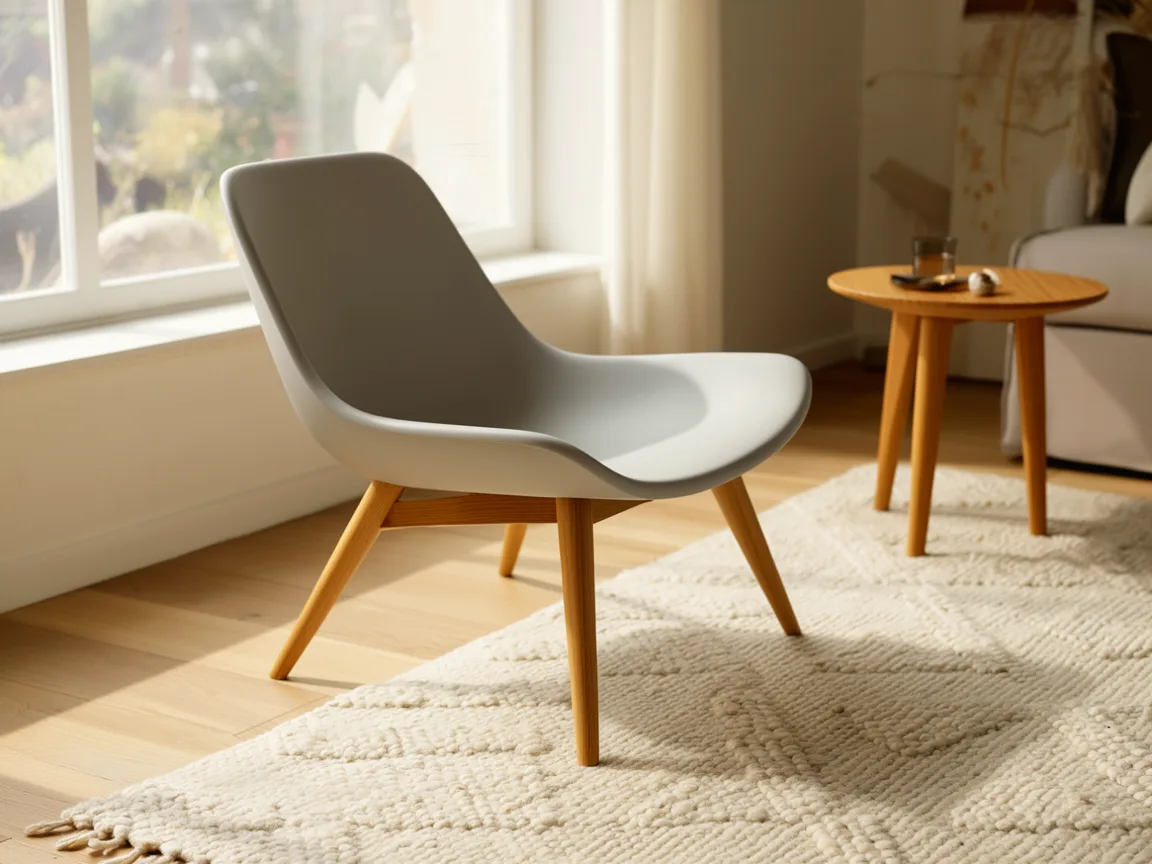
Sketch to room scene: After
Sketch to room scene: Before
BeforeAfter

Sketch to room scene

Render this sketch as a photorealistic photograph of the same chair in a sunlit living room beside a large window, with a wool rug and a small oak side table. The chair keeps the same outline, proportions and viewpoint; real materials and natural light from the same angle. No text.

Describe the setting around the drawn object; the drawing still sets its shape.

Use in studio
Edit · Needs a starting image
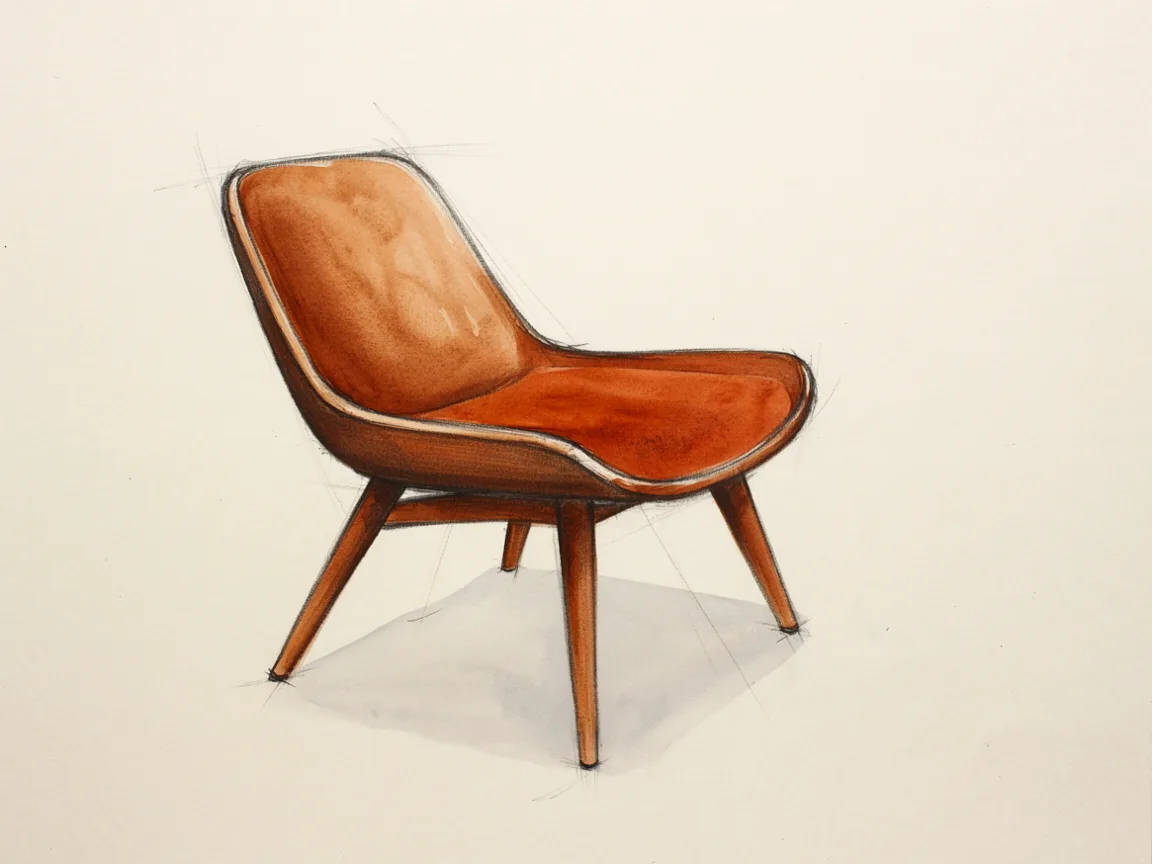
Add watercolor washes: After
Add watercolor washes: Before
BeforeAfter

Add watercolor washes

Add soft watercolor washes to this drawing: warm walnut brown for the shell, cognac for the cushion and a pale grey shadow under the chair. Keep every pencil line exactly as it is.

Keep the lines unchanged and assign a color to each area.

Use in studio

Example images were made with these exact prompts on Ideogram 4.5. Your results will vary.

Prompts are written in English, which gives the most consistent results. You can still edit them freely.

Reframe, which changes the canvas proportions, is not available in this studio yet.

Ideogram4.5

A place for ideas to become images.

CreateImage studioExamplesPrompt libraryPricing
A little helpQuestionsYour accountOfficial model ↗
Ask AI about usChatGPT ↗Claude ↗Perplexity ↗For AI agents
The essentialsPrivacyTermsCookies

Independent workspace. Not affiliated with or endorsed by Ideogram, Inc.

© 2026 Ideogram 4.5 Studio
Make room.